Saturday, June 4, 2022

Make You Liferay DXP Application Configurable


Before Liferay DXP if we need to provide some configuration then we have two option :-

1)Provide configuration in portal-ext.properties

2)Use portal.properties 

In both cases we need to either redeploy the portlet or restart the server. In this blog we will see how to make our application configurable so that we don't need to restart or redeploy the portlet.Here i am using Liferay 7.3

So lets start this step by step :-


Step 1:- Create a simple MVC Portlet
Let's create a simple MVC portlet and then create a simple package in it. After that create a interface with this code :-

DemoConfiguration.java
package com.liferay.demo.configuration;
import com.liferay.portal.configuration.metatype.annotations.ExtendedObjectClassDefinition;
import com.liferay.portal.configuration.metatype.annotations.ExtendedObjectClassDefinition.Scope;
import aQute.bnd.annotation.metatype.Meta.AD;
import aQute.bnd.annotation.metatype.Meta.OCD;
@ExtendedObjectClassDefinition(category = "LiferayIsEasy", scope = Scope.SYSTEM)
@OCD(id = "com.liferay.demo.configuration.DemoConfiguration",localization = "content/Language", name = "demo-configuration")
public interface DemoConfiguration {
@AD(deflt = "a@gmail.com", required = true,description = "provide-recipient-email",name = "Recipient Address")
public String recipientEmailAddress();
@AD(required = false,description = "provide-sender-email",name="Sender Address")
public String senderEmailAddress();
@AD(optionLabels = {"Male", "Female"},optionValues = {"male", "female"},
required = true,name = "Gender",description = "Select Gender")
public String gender();
}


Explanation:-

1)In the 9th line we provide the category where our configuration is displayed in control panel system setting.
2)In 10th line we need to pass 3 things 
   a)id : full path of your interface
   b)localization : your Language.properties file
   c)name : name which is displayed in system setting.
3)Here we can use keys those values we can pick from Language.properties or you can directly pass the value also. Like For sender and receiver description we pick from Language.properties and for gender description we directly mention.

Step 2:- Provide values in Language.properties
Now add the keys values which we use in DemoConfiguration.java

Language.properties
demo-configuration=Demo Configuration
provide-recipient-email=Please provide recipient email
provide-sender-email=Please Provide the Sender Email

Step 3:- Deploy and Configure
Now deploy you portlet and go to control panel-> Configuration-> System Setting


Click on System setting then scroll down and you will see your category which we mention in DemoConfiguration.java


Click on category.LiferayIsEasy you will see your Demo Configuration inside System Scope


Here you can provide any values and click update.

Step 4:- Fetch values in Portlet
Now Open your portlet in my case DemoPortlet.java and paste this code :

DemoPortlet.java
package com.liferay.demo.portlet;
import com.liferay.demo.configuration.DemoConfiguration;
import com.liferay.demo.constants.DemoPortletKeys;
import com.liferay.portal.configuration.metatype.bnd.util.ConfigurableUtil;
import com.liferay.portal.kernel.portlet.bridges.mvc.MVCPortlet;
import java.io.IOException;
import java.util.Map;
import javax.portlet.Portlet;
import javax.portlet.PortletException;
import javax.portlet.RenderRequest;
import javax.portlet.RenderResponse;
import org.osgi.service.component.annotations.Activate;
import org.osgi.service.component.annotations.Component;
import org.osgi.service.component.annotations.Modified;
/**
* @author adit2
*/
@Component(
immediate = true,
property = {
"com.liferay.portlet.display-category=Liferay Is Easy",
"com.liferay.portlet.header-portlet-css=/css/main.css",
"com.liferay.portlet.instanceable=false",
"javax.portlet.display-name=Demo",
"javax.portlet.init-param.template-path=/",
"javax.portlet.init-param.view-template=/view.jsp",
"javax.portlet.name=" + DemoPortletKeys.DEMO,
"javax.portlet.resource-bundle=content.Language",
"javax.portlet.security-role-ref=power-user,user"
},
service = Portlet.class,
configurationPid = "com.liferay.demo.configuration.DemoConfiguration"
)
public class DemoPortlet extends MVCPortlet {
private volatile DemoConfiguration configuration;
@Activate
@Modified
protected void activate(Map<String, Object> properties) {
configuration = ConfigurableUtil.createConfigurable(DemoConfiguration.class, properties);
}
@Override
public void doView(RenderRequest renderRequest, RenderResponse renderResponse) throws IOException, PortletException {
String recipientEmail = configuration.recipientEmailAddress();
String senderEmail = configuration.senderEmailAddress();
String gender = configuration.gender();
System.out.println("Receipent Mail : "+recipientEmail+ " ,Sender Mail : "+senderEmail+" ,Gender : "+gender);
super.doView(renderRequest, renderResponse);
}
}

Explanation:-

1)Focus on line 37 Where we pass configurationPid which is path of our interface
2)From 40 to 46 we initialize our configuration  .
3)From 51 to 53 we simply get the values.
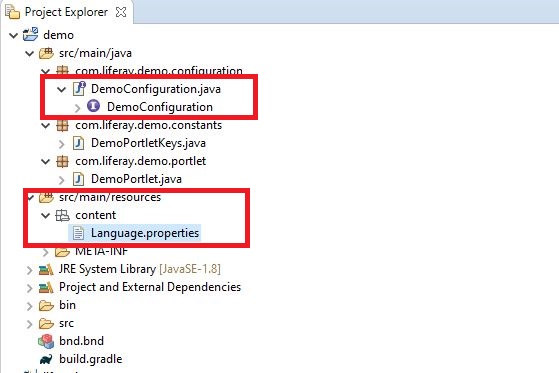
Project Structure


Note : You can download the source code from here .

No comments:

Post a Comment

Total Pageviews

1038381

Number Of Unique Visitor

Free counters!