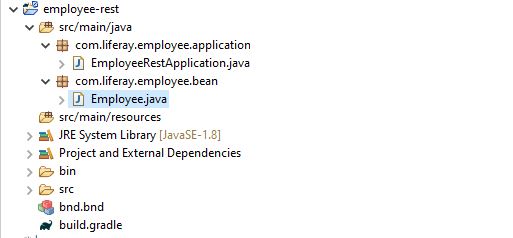
We already know how to create Rest API in Liferay 7 (JAX-RS Web Services). Today we will see how we can use spring and add objects in Liferay databases. Here we will create a Rest service that will add data in Liferay database. Before reading this blog it is highly recommended to read how to create Rest API in Liferay 7 (JAX-RS Web Services). Here i am using Liferay 7.3.
So lets start this step by step :-
Step 1:- Create a simple Rest Portlet
Create a simple Liferay module Project and select Rest Template provide class name and package name and Click Finish. Now open your java file and paste this :-
EmployeeRestApplication.java
package com.liferay.employee.application; | |
import com.liferay.employee.bean.Employee; | |
import com.liferay.portal.kernel.json.JSONFactoryUtil; | |
import com.liferay.portal.kernel.json.JSONObject; | |
import java.util.Collections; | |
import java.util.Set; | |
import javax.ws.rs.Consumes; | |
import javax.ws.rs.GET; | |
import javax.ws.rs.POST; | |
import javax.ws.rs.Path; | |
import javax.ws.rs.Produces; | |
import javax.ws.rs.core.Application; | |
import javax.ws.rs.core.MediaType; | |
import javax.ws.rs.core.Response; | |
import org.osgi.service.component.annotations.Component; | |
import org.osgi.service.jaxrs.whiteboard.JaxrsWhiteboardConstants; | |
import org.springframework.web.bind.annotation.RequestBody; | |
/** | |
* @author adit2 | |
*/ | |
@Component( | |
property = { | |
JaxrsWhiteboardConstants.JAX_RS_APPLICATION_BASE + "=/employee", | |
JaxrsWhiteboardConstants.JAX_RS_NAME + "=Employee.Rest" | |
}, | |
service = Application.class | |
) | |
public class EmployeeRestApplication extends Application { | |
public Set<Object> getSingletons() { | |
return Collections.<Object>singleton(this); | |
} | |
//http://localhost:8080/o/employee/ | |
@GET | |
@Produces("text/plain") | |
public String working() { | |
return "Get API by Aditya.."; | |
} | |
//http://localhost:8080/o/employee/add-employee | |
@POST | |
@Consumes(MediaType.APPLICATION_JSON) | |
@Produces(MediaType.APPLICATION_JSON) | |
@Path("/add-employee") | |
public Response addEmployee(@RequestBody Employee employee) { | |
System.out.println("Hello : "+employee); | |
//Add Employee by using LocalServiceUtil | |
JSONObject obj = JSONFactoryUtil.createJSONObject(); | |
obj.put("message", "Employee Added Successfully.."); | |
return Response.status(Response.Status.CREATED).entity(obj.toString()).build(); | |
} | |
} |
Step 2:- Add Dependencies in build.gradle
Now open build.gradle and paste the dependencies :-
build.gradle
dependencies { | |
compileOnly group: "javax.ws.rs", name: "javax.ws.rs-api" | |
compileOnly group: "org.osgi", name: "org.osgi.service.component.annotations" | |
compileOnly group: "org.osgi", name: "org.osgi.service.jaxrs" | |
//Add these two dependencies | |
compileOnly group: "com.liferay.portal", name: "release.dxp.api" | |
implementation group: 'org.springframework', name: 'spring-web', version: '4.3.11.RELEASE' | |
} |
Step 3:- Create Employee Bean
Create Employee.java that contain setter and getters which can parse Json to Employee object and used with @RequestBody
Employee.java
package com.liferay.employee.bean; | |
public class Employee { | |
private int eid; | |
private String firstName; | |
private String lastName; | |
private String gender; | |
private int age; | |
public int getEid() { | |
return eid; | |
} | |
public void setEid(int eid) { | |
this.eid = eid; | |
} | |
public String getFirstName() { | |
return firstName; | |
} | |
public void setFirstName(String firstName) { | |
this.firstName = firstName; | |
} | |
public String getLastName() { | |
return lastName; | |
} | |
public void setLastName(String lastName) { | |
this.lastName = lastName; | |
} | |
public String getGender() { | |
return gender; | |
} | |
public void setGender(String gender) { | |
this.gender = gender; | |
} | |
public int getAge() { | |
return age; | |
} | |
public void setAge(int age) { | |
this.age = age; | |
} | |
@Override | |
public String toString() { | |
return "Employee [eid=" + eid + ", firstName=" + firstName + ", lastName=" + lastName + ", gender=" + gender | |
+ ", age=" + age + "]"; | |
} | |
} |
Step 4:- Test your API
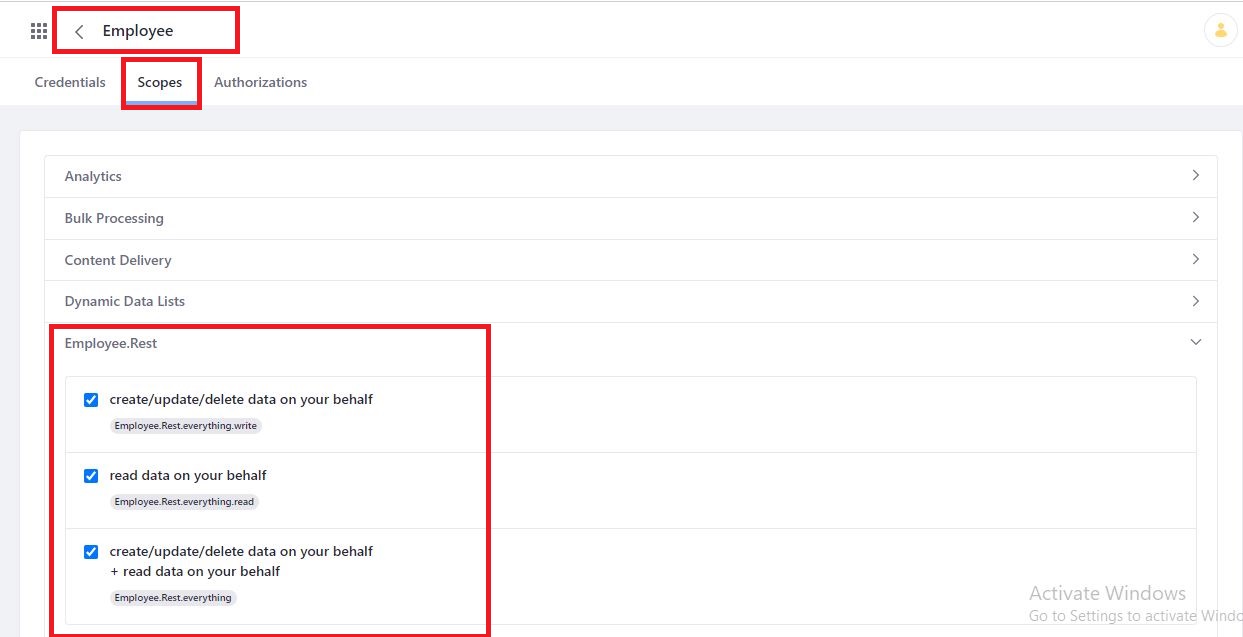
Deploy your project and test the API using postman
No comments:
Post a Comment